Disclosure: Some of the links below are affiliate links, meaning, at no additional cost to you, Storehacks may earn a commission if you click a link to an external source.
Have you ever given some thought to selling your store? Do you have unique content, products, social media followings or something of value that you could sell and want to sell your Shopify store on Flippa?
I recently sold a store of mine and while I am not going to give you the URL (that would be cruel to the new owner) I will take you through the steps and give you some tips on how to help you sell your store.
It is not daunting by any means, at least in terms of the set-up, it does, however, take a little time to get all the required details you need to provide as much information as possible. Remember, you don’t know these people and they don’t know you, trust is built with the information you provide.
When I first launched my listing, it took me about 5 separate attempts as things that I required meant I had to redo the whole process, starting over each time. This was quite annoying. It is my aim to help you save as much time as possible when getting your store up for sale.
How to Sell Your Shopify Store on Flippa
Step 1. Enter your domain name.
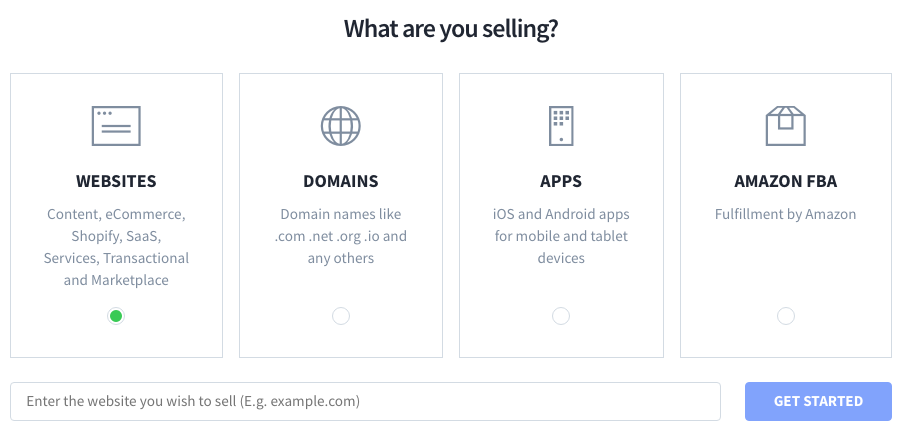
- Enter your domain name
- Click “Get Started”
Step 2. Fill in your basic website details
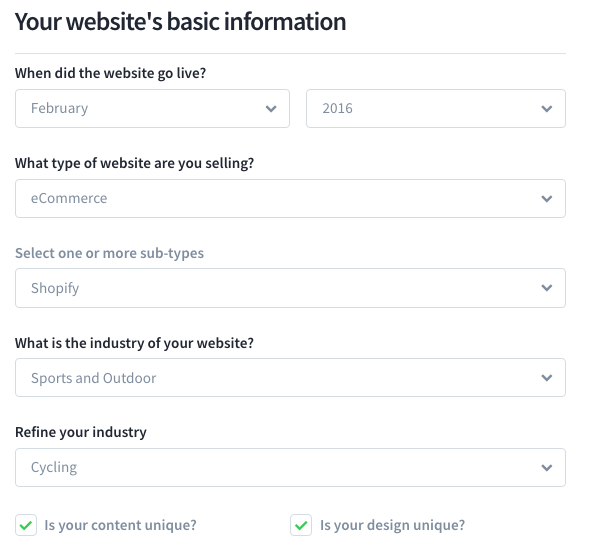
Note: Being as accurate as possible here will save you tons of time.
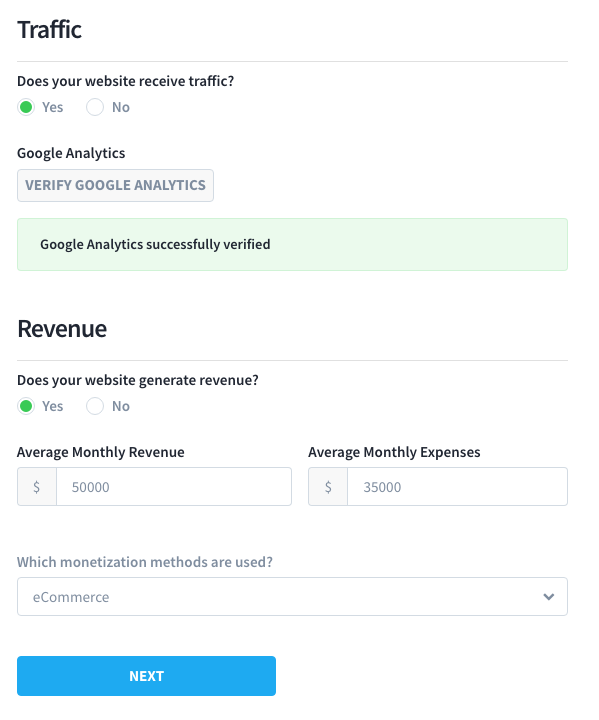
- Select “Yes” for receiving website traffic. If you’ve read my previous article How to Set Up Google Analytics for Shopify your analytics will be ready to verify.
- Log in to your analytics account which is associated with your store.
- Under Revenue, if you have received any select “Yes”
- As suggested workout from your store the average monthly revenue and expense and type it in.
- Under monetization methods select “eCommerce”
Step 3. Explain in detail what your website is.
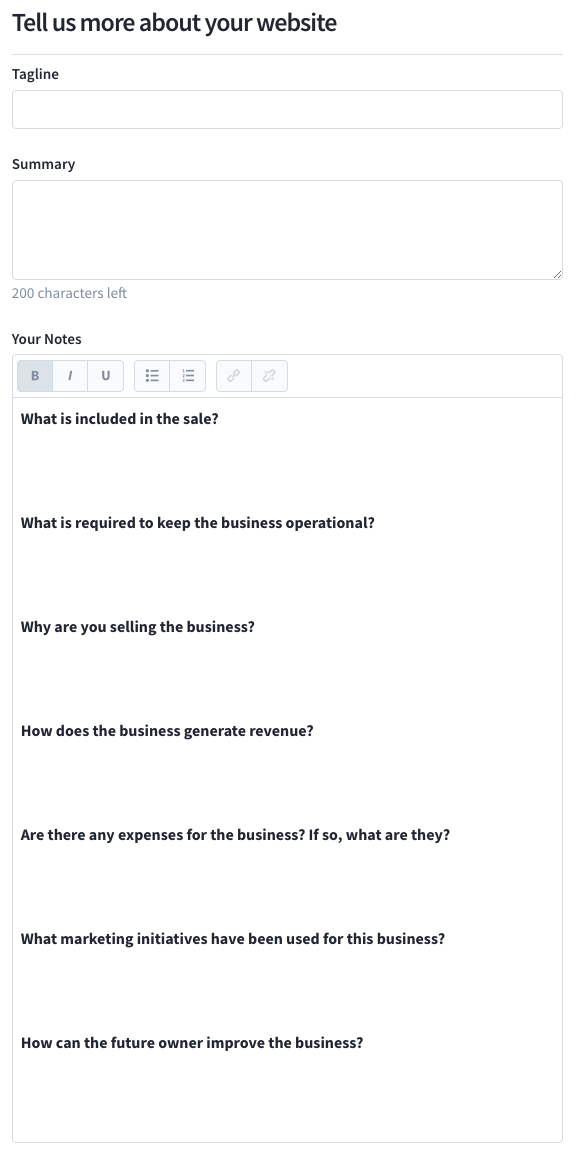
Note: It is very important to list as much detail here as possible. Be transparent and remember to include everything of value, i.e. trademarks, social media followings, the reason for sale, etc
How would you like to sell it?
This step requires you to think about the absolute minimum you are willing to take for your store. Unless you have something of value in your shop it is unlikely it will sell.
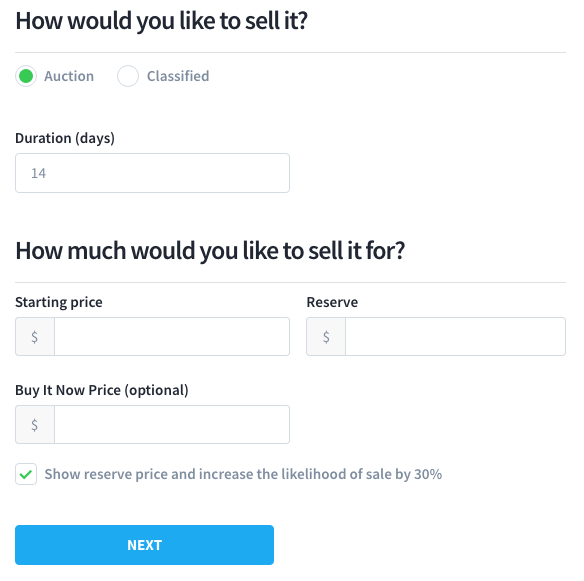
- Select “Auction” if that is your preferred method.
- Start the price at “$1.00” (this obviously depends on your comfort level and what you’re willing to accept, remember you can put in a reserve.
- Set Buy it Now price higher than your desired sale price.
Note: Showing a low Reserve price can help your stores chance of sale dramatically. If people know it will sell it will inevitably attract more bids and more bids mean you will end up on the Websites Most Active list. You must be willing to let your site sell at the Reserve price. It is up to you what you sell it for.
Step 3. Select a Listing Package
I went with the Recommended “Show Off Package”
NOTE: If you value your website and what your purchaser is buying I suggest 100% to get an NDA added to your listing. It is worth the extra $100 as it stops the hacks from ripping off your store, copying everything and launching there own in a matter of hours. The more successful your store has been the more important it is for you to have one.
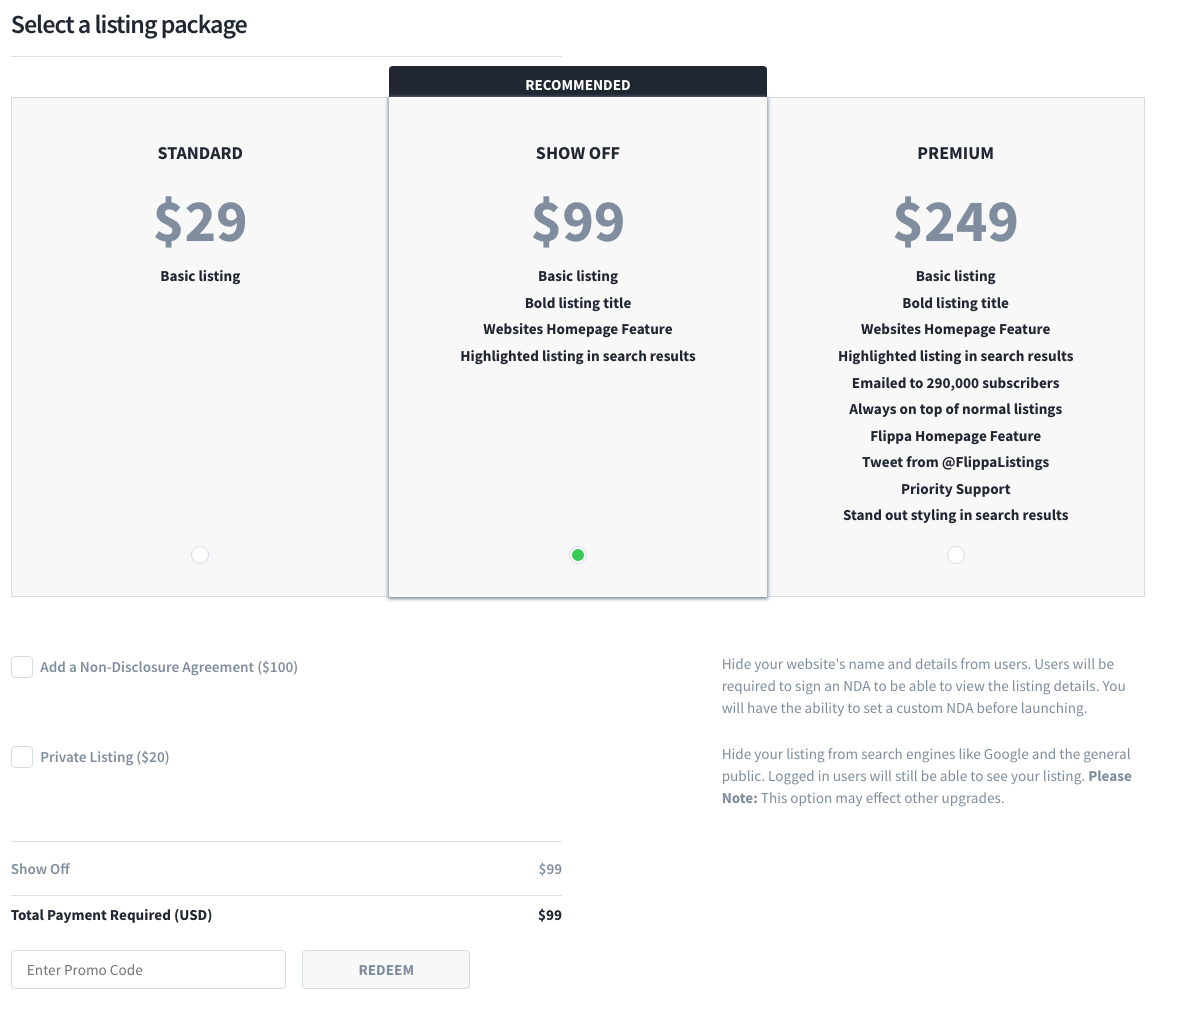
I made the mistake of launching it without the NDA and had a ton of traffic coming in straight from Flippa. If by chance you don’t sell it this will screw with your custom audiences…and you don’t want that!
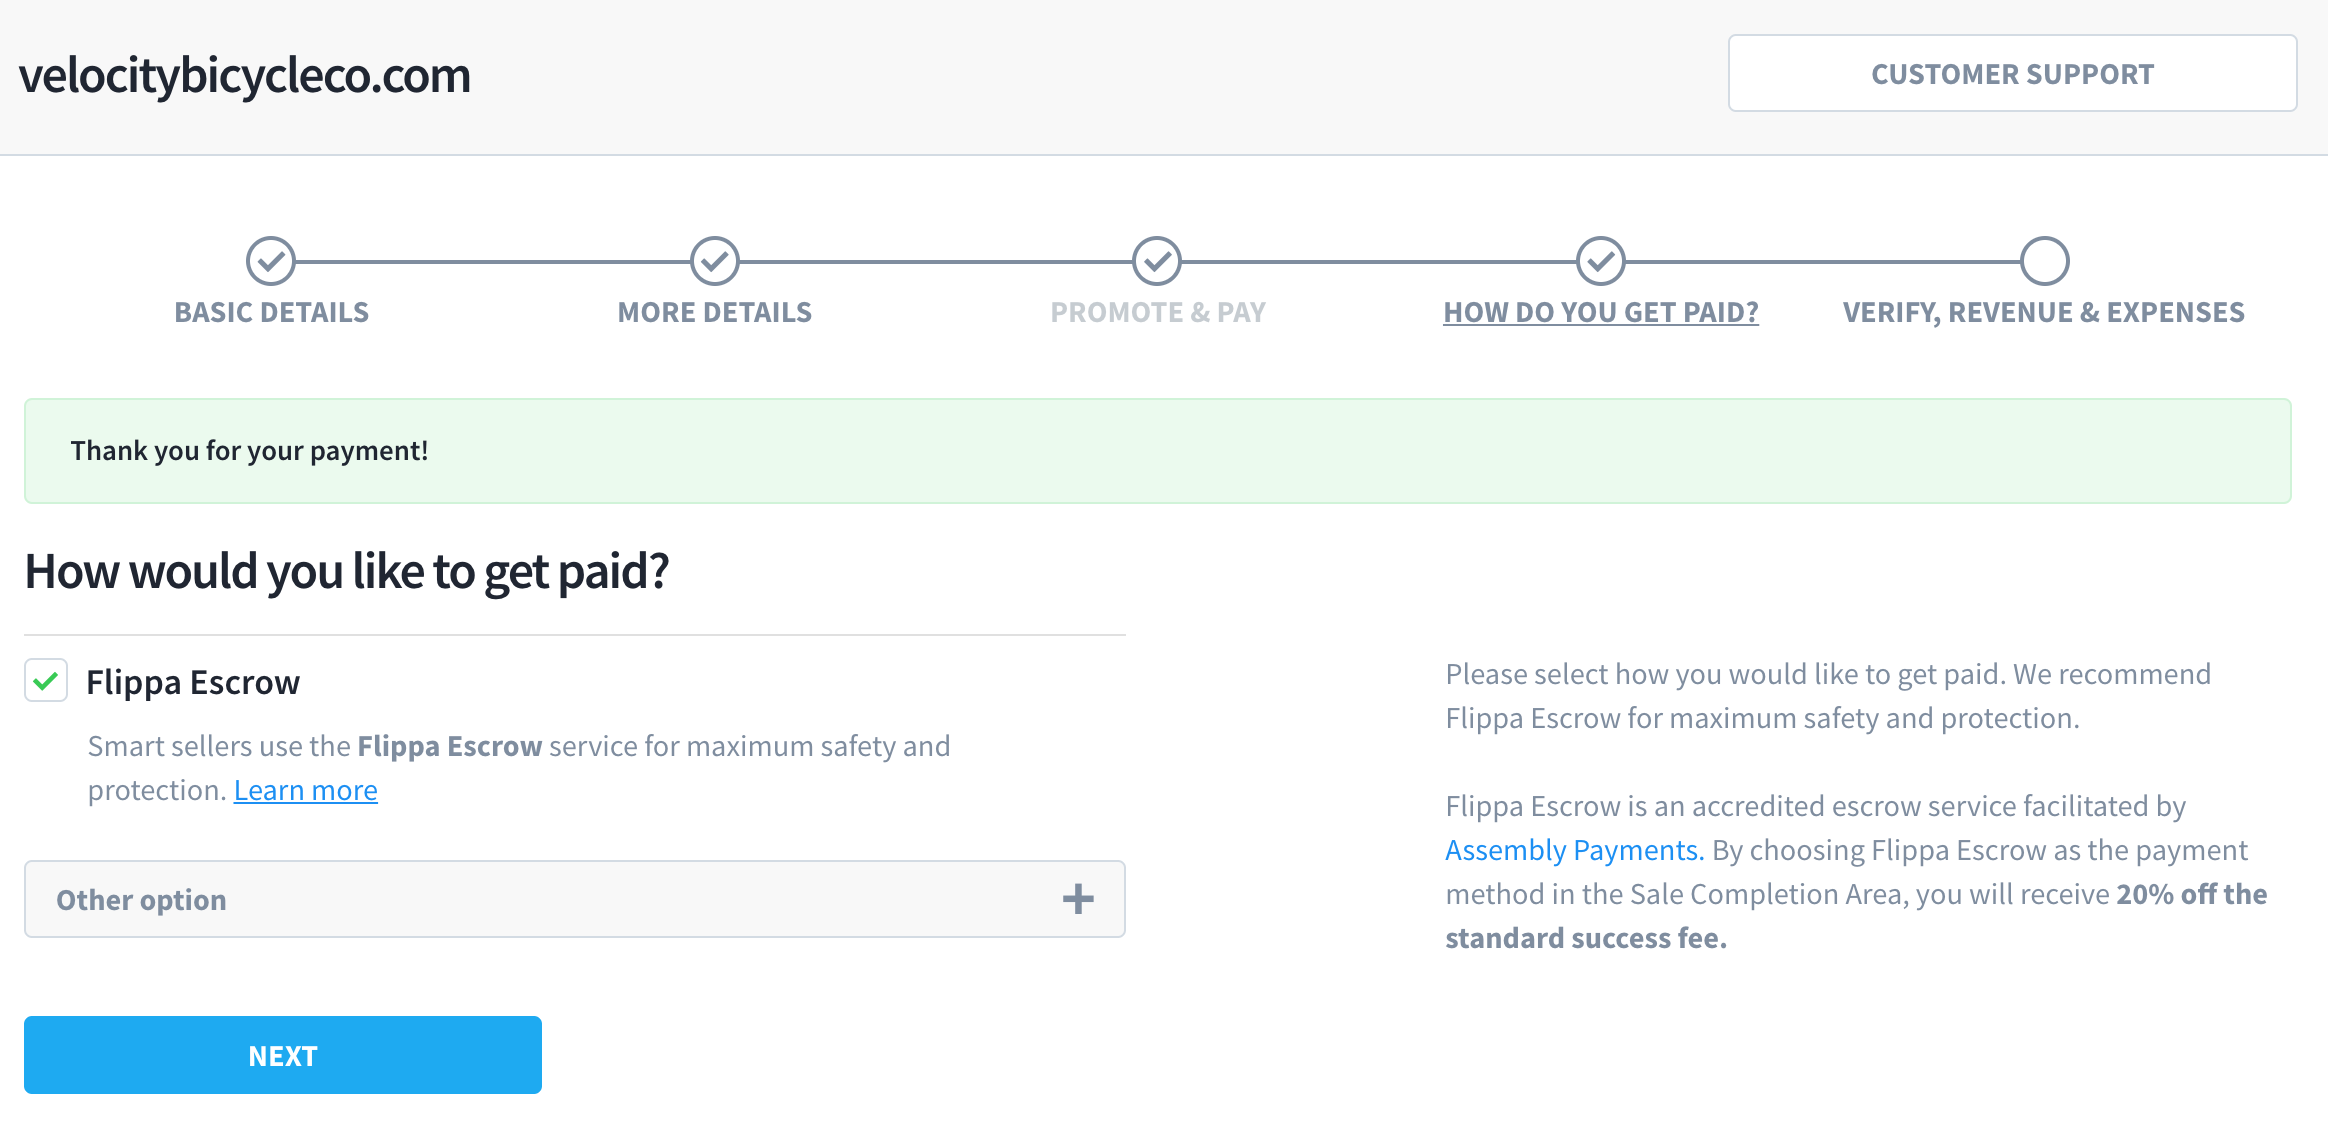
Step 4. Select how you’d like to be paid.
This one is obvious. Select how you’d like to pay for your listing. You have 2 choices, PayPal or credit card.
Using Flippa escrow will save your 20% on the succession fee. I used it and was certainly worth the discount.
You can use PayPal however it is not as secure and not accepted in some countries. Any purchases over $10,000 will void the ability to use it.
Step 5. Verify ownership
This part can feel a little daunting however following these steps will have you verified in seconds.
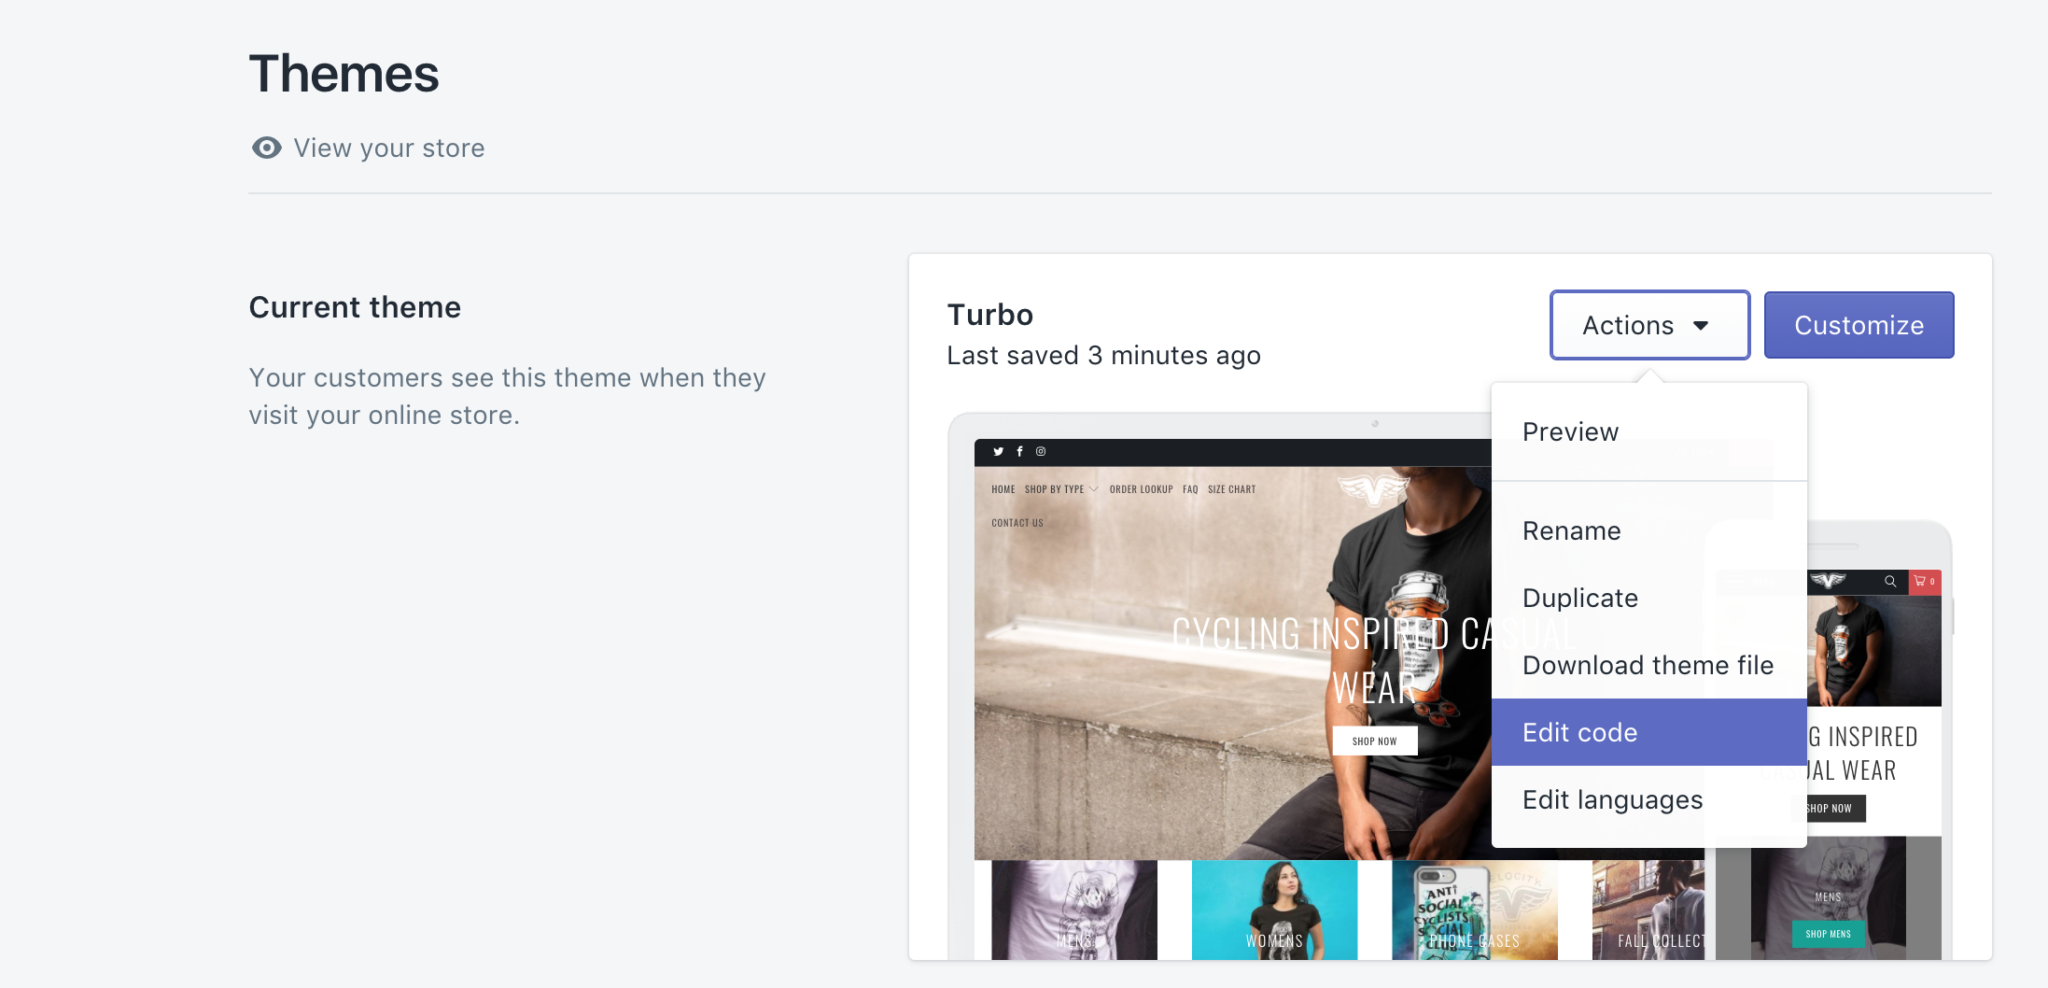
- From your Shopify dash select “Online store” from the left-hand pane.
- Select “Theme”
- On the current theme click the “Actions” dropdown menu next to Customize
- Select Edit Code
- In the left-hand pane under layout select “theme.liquid” under layout.
- Under the <head> tag insert your meta tag from Flippa.
- Click “Save”
- Go back to your Flippa listing and click “Verify meta tag”
- You should then see “Ownership successfully verified”…
 Verify revenue
Next, you will need to input revenue and expenses in the last 12 months. Include absolutely every bit of expenditure on the business in here. Take screenshot, download bank statements. Don’t forget to include things like transaction fees, currency conversions fees or any other somewhat “hidden fee”.
Paypal & Stripe make it incredibly hard to get a total of fees paid for any given time to ensure you do the necessary research to be as accurate as possible. More time here will mean your store will sell for the final bid amount and not be open to further negotiation. I lost over 2.5k purely for missing bank fees. Amateur mistake, but my mistake means you don’t have to do the same thing.
Verify proof of revenue
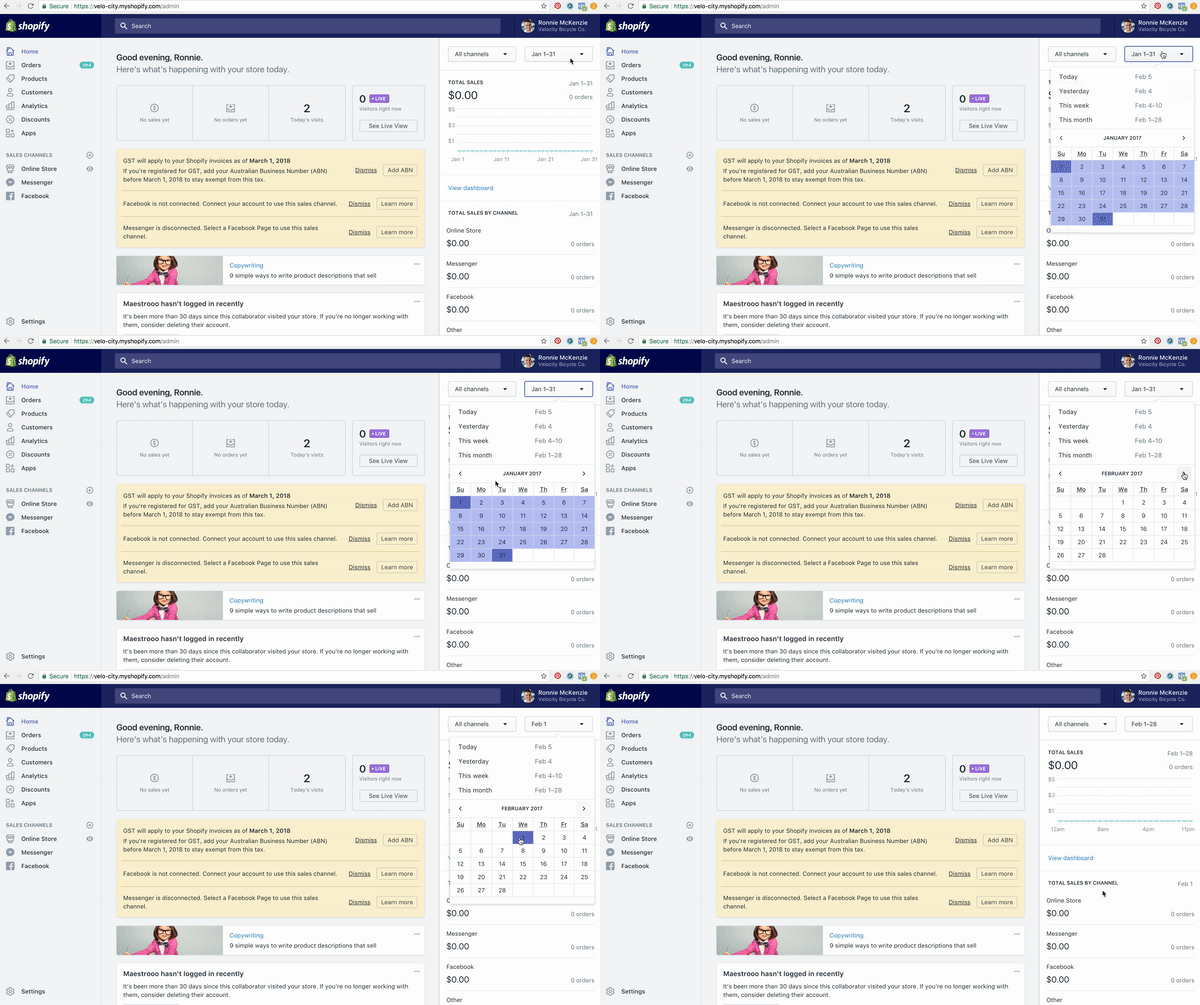
The easiest way to provide proof of revenue is to record your screen with Quicktime and upload the vid to youtube. Be sure to include the URL of the page when you’re recording. Flick through month by month from your dashboard.
- Upload video to Flippa
- Schedule a start time or leave blank
- Click “Save and preview” or “Launch Listing”
Conclusion
Congratulations! You have now listed your site for sale. A word from the wise, ensure each question is answered as truthfully and in as much detail as possible. The more genuine you are in your attempt to help the easier it will be to put buyers minds at ease and feel comfortable in bidding.
I would love to hear your experience with selling your store. What are your tips that you would like others to know? Comment below.



 Verify revenue